Make Changes to a Plan or Request
Edit and Update Transportation Plans and Requests
Once a plan/request has been added, the administrator can edit or update the plan to assign agents, add vendors, additional travelers, and/or location information.
Click on the “Transportation” page.
Click on the plan you want to edit.
Click the “edit” button.
Add your edits.
Select “yes” in the “send notification” field if you want an email alert to be sent to all personnel associate with the plan/request.
Click submit.
If any vendors are associated with the plan/request, you can choose to notify them or exit the screen.

Edit Itinerary and Destinations in a Plan/Request
Administrators, agents, and vendor agents can edit destinations in an existing plan/request.
Click on the Transportation page.
Select the plan or request you wish to edit.
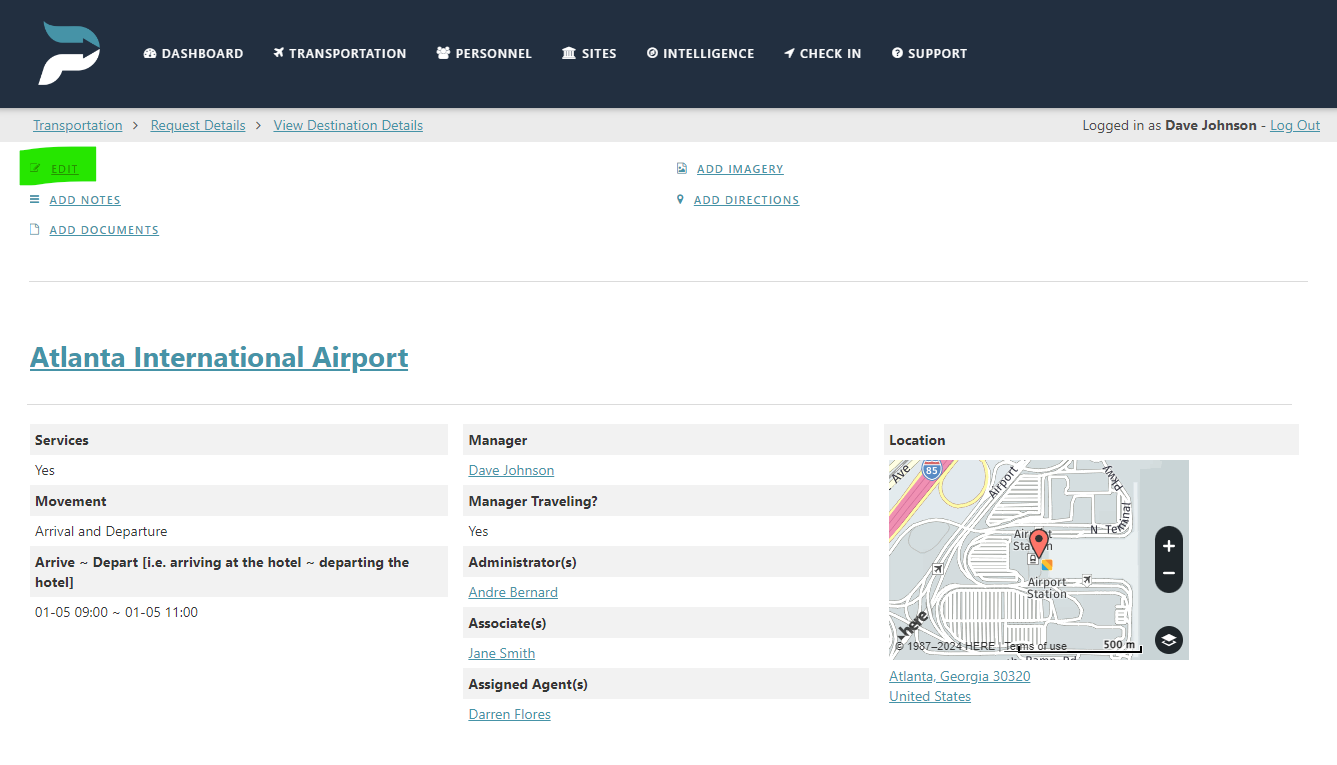
Scroll down to the Itinerary section and click on the “Edit” link next to the destination you wish to edit.
Click on the “Edit” link on the destination page.
Make the changes.
Click on the “Submit” button.
Notify vendors by click on the “Send” button in the “Notify Vendor” field at the bottom of the form.
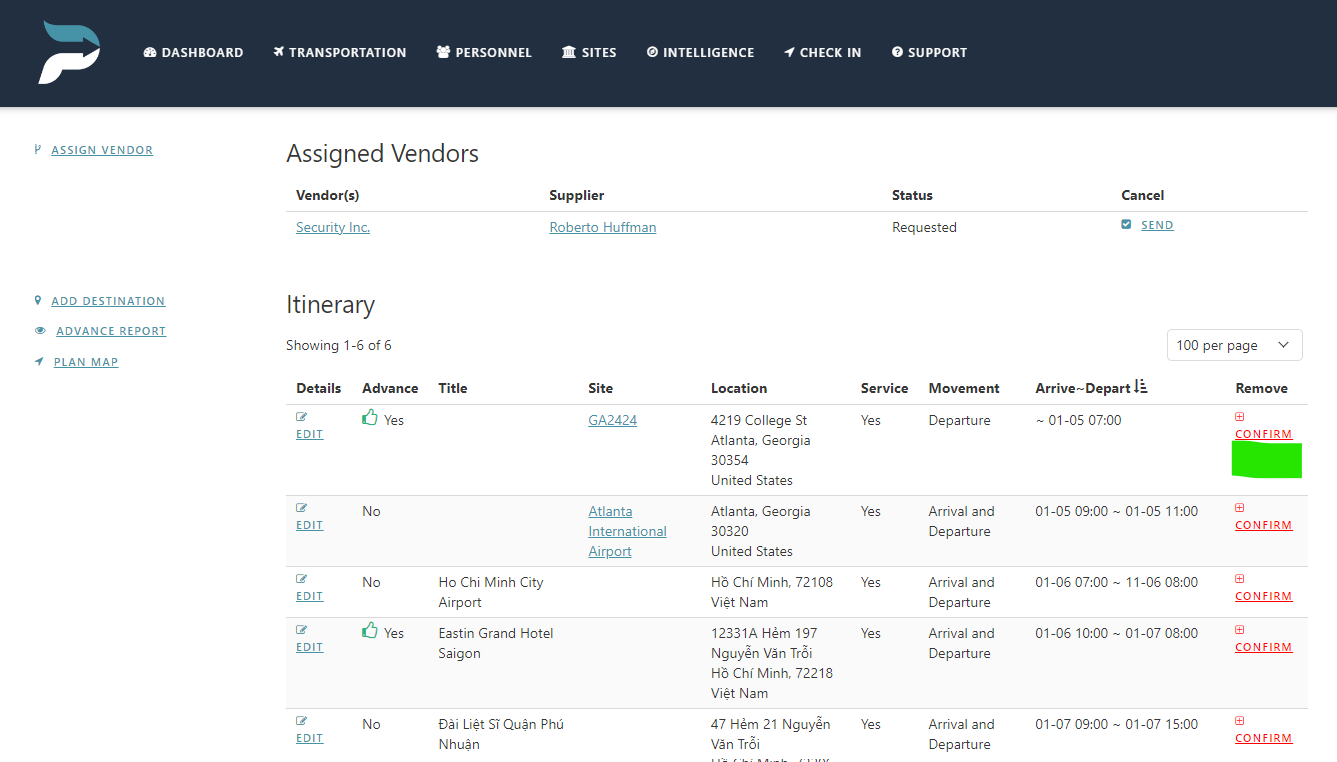
Remove a Destination from a Plan/Request
Administrators, agents, and vendor agents, can remove a destination from a plan/request. Once this has been done, that destination and any advance information is also removed.
Click on the “Transportation” page.
Click on the transportation plans/request.
Click on “Confirm” in the “Remove” field.
Select “Yes” in the “Remove Location” field.
Select “Yes” to send a notification of removal to all internal personnel associated with the plan/request.
Click submit.
Notify vendors by click on the “notify vendor of changes” link at the bottom of the form.
An email will be sent to notify affiliated personnel and vendors that the location has been removed.
Add Destinations to an Itinerary
Administrators, agents, and vendor agents can add destinations to an existing plan/request.
Click on the “Transportation” page.
Click on the transportation plans/request.
Click on the “Add Destination” button.
Select if you are using services to notify internal personnel or vendors that a pick-up or drop-off needs to be planned.
Select the arrive and depart times. This is entered from the perspective of a vendor picking up, dropping off, or stopping at a destination (i.e. vendor arrives - at address 01/15/2023 15:00pm and departs the address at 01/15/2023 15:30pm).
Select “Yes” in the “is the destination a current site” field to automatically associate a current site with the record. Leave it as “No” if you wish to enter a new destination.
Add a title for the location (i.e. grand hotel, phoenix)
Add the address or use geo coordinates for a more accurate location (i.e. copy and paste from google maps or another mapping system).
Select ”Yes” in the “Send Notification” field if you wish to notify all internal personell associated with this plan/request.
Click “submit”.
Notify vendors by click on the “Notify vendor of changes” link at the bottom of the form.

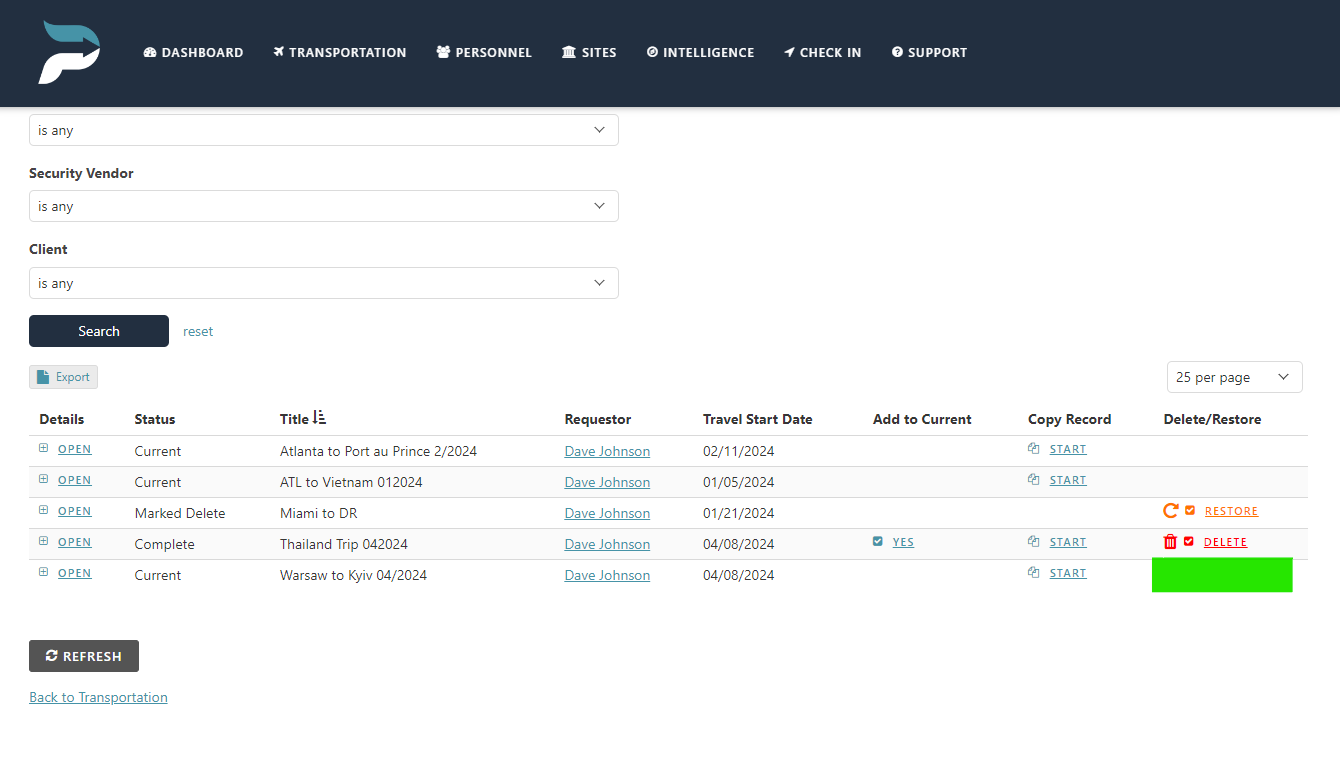
Deleting Records
All of your records can be permanently deleted in Predictions. We have processes in place to ensure you do not accidentally delete a record and that it can be recovered should you do so. To delete a records and all associated child records, do the following;
Go to the search function associated with your record.
Click on the “delete” link under the “delete/restore” heading (the record cannot be currently in use and must be marked complete or removed).
The records will be marked delete until Sunday at 0800 AM Eastern. At that time it will be permanently removed from the database.